Maintain your chainsaw – for a perfect cutting result

If you own a large garden and are a passionate hobby gardener, you probably have several devices to make your work more manageable. To keep your garden in excellent shape, you recently added a chainsaw to your collection. While it served you well during the fall, you may be wondering about the best ways to maintain the device and, most importantly, how to change the chain. Our guide provides detailed instructions for these tasks.
Chainsaws are indispensable tools for every hobby gardener, especially during spring and autumn. Regular maintenance is crucial for all electrical devices, and it becomes a necessity for chainsaws. Not only does it keep the chainsaw running smoothly, but it also prevents rust formation. Follow these steps for effective chainsaw maintenance.
Step 1 – Preparation
Before beginning maintenance, ensure the chainsaw is placed on a stable surface like a sturdy table or workbench. The chainsaw should lie flat on the table, and if it's powered by electricity, it should be disconnected. For battery-powered chainsaws, remove the battery, and for gasoline-powered ones, drain the fuel.
Step 2 – Remove the chain
Start by releasing the anti-kickback chain brake, a standard feature in modern chainsaws. Use a wrench to loosen the nuts on the side of the bar, allowing you to separate the bar and chain from the drive head.
Step 3 – Cleaning the case
Once the chainsaw is disassembled, cleaning begins. Ideally, use a specialized cleaner for the housing; however, conventional means can be used as well. Clean the bar with the same cleaner.
Step 4 – Cleaning the chain
After disassembly, focus on cleaning the chain. Given the difficulty of removing grease from the chain links, use a specialized cleaner. Apply the cleaner and let it soak for 10 to 15 minutes, then loosen the dirt with a wire brush and wipe it off with a clean cloth. Rinse the chain with soap and water, and thoroughly air dry before proceeding.
If a specialized cleaner is unavailable, create a mixture of water and ammonia, soak the chain for half an hour, scrub thoroughly, rinse with clean water, and dry completely.
Step 5 – Lubricate the chain
After cleaning, properly lubricate the chain using specialized products. Spray the lubricant onto the chain, ensuring thorough coverage. Wipe off any excess lubricant with a cloth. Before reinserting the chain, remove all residues as thoroughly as possible.
Step 6 - Clean carburetor and air filter (petrol chainsaw)
For a petrol chainsaw, regular checks and cleaning of the carburetor and air filter are essential. The carburetor can easily become clogged with sawdust, leading to fuel flow blockages and starting issues. Clean the carburetor by spraying a fuel additive or using compressed air. Remove and clean the membrane, needle valves, and cover plate.
The air filter can be cleaned with soapy water. If the dirt is stubborn, consider replacing the filter.
Step 7 – Assembly
Reinstall the chain onto the chainsaw, place the housing back on, and securely tighten the nuts. This completes the maintenance, and the device is ready for use again.
Optional: Sharpen the chain
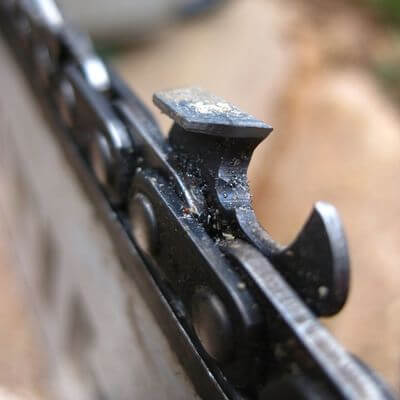
If necessary, sharpen the chain. Chains wear out over time but don't always require immediate replacement. The chain can be re-sharpened if it becomes dull. Clamp the chainsaw in a vice, securing it with a hard guard. Use a file, such as a special sharpening file or a round file, to process the saw blade.
Push the file horizontally over the saw blade, lifting it at the end, and repeat the same motion. Ensure to sharpen only in one direction. The sharpening technique may vary between chainsaw models. Before sharpening, consult the manufacturer for the recommended tools and specific procedures.
Changing a saw chain becomes necessary under certain circumstances. If excessive pressure is required during sawing or if it's noticeable that the saw chain moves slowly or not at all, replacement is crucial. Additionally, a chain change is necessary when the wear mark has been reached or when the longest part of the incisor is less than 4 mm in length. Regularly monitoring these indicators ensures optimal chainsaw performance and safety.

Changing a saw chain is quite similar for all chainsaws. First, make sure to prepare appropriately. Of course, the chainsaw must be turned off before changing the chain; for powered models, unplug it, and for cordless saws, remove the battery. It's ideal to wear cut-resistant gloves and have the necessary tools ready – a socket wrench, a screwdriver, and a grease gun. If you still have the device's operating instructions, be sure to consult them.
The basic principle of every chainsaw is the same, but individual models may differ slightly, and therefore the process might vary. A glance at the operating instructions shows how the chain should be changed. Always follow the instructions in the operating manual. The following steps outline the basic process for changing the chain.
1. Remove the cover
To take off the cover, simply unscrew two nuts on the side of the device using a socket wrench, then remove the cover.
2. Relax the chain
For chainsaws without a quick-release function, the chain needs to be relaxed. Loosen the locking screw with a suitable screwdriver, typically found between the two bolts of the cover or next to the sword.
3. Removing the saw chain
Now, remove the chain by taking off the sword from the guide pins and pulling the chain off the sprocket. Easily pull the chain out of the bar groove by hand, avoiding the use of tools to prevent damage.
Take this opportunity to clean the chainsaw before putting on the new saw chain. Remove coarse dirt, clean the sword groove, and grease the diverter star.
4. Put on a new chain
When putting on the new chain, ensure it points in the right direction. Chainsaws usually have a clockwise rotation, so it's essential that the arrows on the chain also point in this direction. If there are no arrows, ensure that the pointed side of the incisors faces the correct direction.
Place the new saw chain around the bar, keeping it under tension. Now, pull the still-free rear piece of the chain around the sprocket and the bar onto the guide pins. The new chain is now installed.
5. Tension the chain
Before tensioning the chain, put on the cover and tighten the nuts firmly by hand. Then, use the locking screw to tension the chain. This step is crucial and must be done carefully. Chains that aren't tight enough can jump out of the guide groove. Conversely, if the chain is stretched too tightly, it might break.
The tension is just right when the saw chain can be raised in the middle of the bar by around 2 to 4 mm without the drive teeth being visible above the edge of the running rail. Once the tension is optimal, tighten the nuts on the cover with the socket wrench. However, new chains should always be checked initially, as joint play may increase slightly during operation.
Chainsaws are versatile tools, stepping in when regular saws fall short, providing high performance. To ensure these devices consistently deliver, proper maintenance is essential. Periodically changing the chain is a key aspect, though it might seem complex, it's actually straightforward. Most operating manuals include a section on chain replacement. Following these guidelines empowers you to effortlessly make the switch yourself.
If you've misplaced the operating instructions, a quick online search often yields results. Many manufacturers now offer manuals on their websites. Seize this opportunity for guidance. A sharp saw chain is paramount for your chainsaw to perform as expected. Regular maintenance guarantees longevity, letting you enjoy the benefits of your chainsaw for an extended period.
